 README
README
Godometer
Godometer is a tool to keep track of distance traveled. This has been used for measuring distance walked on a treadmill, but could probably be adapted to exercise bikes, as well as completely different uses.
Godometer consists of three parts, of which 2 are bundled together.
- Godometer monitor: Monitors sensor input to determine movement speed and distance, reports the data once per minute to Godoserv.
- Godoserv: Receives data from monitoring component, calculates stats (per minute, hour, day, week, month and year) and stores recent events. Provides API for frontend to read the data from.
- Godometer frontend: Gathers data from Godoserv, and visualizes it. Draws both graphs that update, as well as shows the latest 2 measurements numerically so you can e.g. see how you're doing today vs. yesterday. The code for this is served by Godoserv to keep things simple.
Tested on Raspberry Pi 4, should work on most Linux supported GPIO chips.
Licensed under the BSD 3-clause license.


Usage
You will need:
- A fair bit of technical knowledge
- Some basic carpentry or 3D printing skills
- Access to a Linux device with a GPIO chip supported by the Linux kernel (and as such warthog618's gpiod), such as the Raspberry Pi 4
- A wheel of reasonable size, likely 50-100mm diameter is fine, smaller means larger uncertainty and errors, too small and the sensor will not keep up. I used a 75mm diameter one. Try to pick one which can grip your target surface well.
- A sensor capable of triggering interrupts when the wheel rotates. E.g. a hall sensor + a pair of magnets should work with little need to worry about wear.
You need to know the circumference of the wheel to a reasonable accuracy, you can check with calipers the diameter and calculate it, or make a mark on the side and run it along a long tape measure, then check where you get after say 20-30 rotations.
You might need:
- Google Cloud project set up
- Basic programming skills
Step 1. Connect the sensor
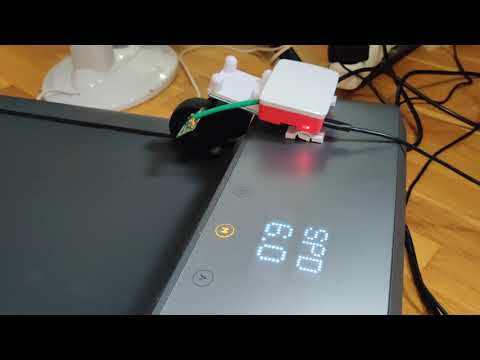
For my case, I attached a small neodymium disc magnet on the side of the wheel, and glued the hall sensor on the side of the wheel assembly so they'd get within a few millimeters once per rotation. My hall sensor also required an opposing magnet to be glued behind it, not sure if this is universally true. My hall sensor package was also somehow poorly designed and I didn't get reliable data out of it until I soldered a jumper wire from some LED's positive side to the interrupt wire

Then wire up the sensor to the GPIO pins of the device. For Raspberry Pi you can find the pinout diagrams at e.g. pinout.xyz. I used the pin 17 / GPIO pin 11 for interrupts since it had no special uses, and it was near the ground and 5V power I needed.
Don't make these connections too permanent until you are certain they all work, but once you know that it's a good idea to make them solid as there is movement involved and if they are not well attached there will likely be issues.
Step 2. Build an attachment
You will want your wheel connected to the treadmill or whatever you're measuring in a reliable manner. I also wanted my Raspberry Pi to be near it instead of having long cables going around, so if you do, take that into account.
What I did was design a 3D print that fits the attachment points on my wheel assembly, and the materials I had available - screws etc., and printed one of them.

You can likely do the same thing with a piece of plywood or similar materials, I just happen to be more comfortable with 3D printing.

You can check out a Youtube video below of how mine was like in the early stages:
Step 3. Test the monitoring
First we need to ensure your If you know how to cross-compile for your target platform easily, you can do this like that too, but it is easier to just compile the code on the target device.
To set up Golang on Raspberry Pi + Raspberry Pi OS you can run e.g.:
# Update your OS
sudo apt update
sudo apt full-upgrade

# You might want to check for latest ARMv6 downloads on https://golang.org/dl/
wget https://golang.org/dl/go1.15.linux-armv6l.tar.gz -O go.tgz

# Extract the Golang distribution
sudo tar -C /usr/local -xzf go.tgz

# Configure your environment
echo 'export GOPATH=$HOME/go' >> ~/.bashrc
echo 'export PATH=$PATH:/usr/local/go/bin:$GOPATH/bin' >> ~/.bashrc
source ~/.bashrc
Once you have a working compiler, get the code on the machine, e.g.:
mkdir -p ~/go/src/github.com/lietu
cd ~/go/src/github.com/lietu
git clone https://github.com/lietu/godometer.git
Figure out which GPIO pin you're hooked to, e.g. from the pinout diagram, and try to run the monitor. In this example I'm using pin 17 and a wheel with 23.75cm circumference (0.2375 in meters).
cd cmd/godometer
go run godometer.go -pin 17 -circumference 0.2375 -apiBaseUrl ""
Check that the system is detecting your data by spinning the wheel a little. If not, check the pin and wiring, with a multimeter you should see ~1.8V coming in the interrupt pin for each rotation trigger.
Once it's working you should see logs like:
YYYY/MM/DD HH:MM:SS Current m/s: 0.7
Step 4. Setting up the server
If you do not plan on using Google Cloud Run you will need to figure this out for yourself, but then I doubt it's a big challenge if you do.
Once you have your Google Cloud project set up, and Google Cloud SDK set up locally, you will still need at the very least Docker installed. I would not recommend the "Docker Desktop for Windows" which depends on Hyper-V which causes massive issues all over the place, but their older Docker Toolbox for Windows and installation via e.g. Minikube is ok.
Figure out which Google region you want to run in (U.S., EU, or Asia), and based on that
decide the Container Registry you use (grc.io, us.gcr.io, eu.gcr.io, or
asia.gcr.io). The
relevant documentation
may help with this.
Once you have that all set up, configure your Docker with the ability to communicate with Google Cloud so you can push your Docker build there. Alternatively check the authentication methods documentation.
gcloud auth configure-docker
You still need to know your Project ID from Google Cloud, which should be easy to determine from the Cloud Console.
Now we're ready to roll. Check out or download the contents of the repository, open up a
terminal in the folder. Then let's build the Docker image. This is assuming you want to
run in EU and your project ID is project-id. Replace these as necessary
docker build . -t eu.grc.io/project-id/godometer:1
This should build the frontend, build the server, and then combine them into a minimal runtime environment. We want to push this to the Google Container Registry now. Make sure this name matches the one you used above.
docker push eu.grc.io/project-id/godometer:1
Now open up your Google Cloud Run console in a
browser. It might take a while for the service to get initialized, but afterwards click
"+ Create service". Choose your Cloud Run region to match the region you pushed to. For
our needs it matters little which option you choose otherwise, but you can check
regions and zones documentation
for details. Give the service a name (e.g. godometer) Ensure you ENABLE "Allow
unauthenticated invocations", otherwise you will not be able to access the frontend.
Click "Next".
In the Container image URL you will want to copy the registry URL
(eu.grc.io/project-id/godometer:1 above) again.
Open up the advanced settings, and the "Variables" tab. Add a variable with the name
API_AUTH, and pick a password to use for communication with the monitor here. You can
use a tool like passwordsgenerator.net to generate
random passwords for this kind of use. Make it something like 16 characters in length
and it should be strong enough for any practical purposes. Try to avoid special
characters and symbols as they can cause issues with shells and such parsing them
instead of passing them unchanged.
I would also recommend you tweak the container tab settings as follows:
- Memory allocated: drop to 128MB - we won't need 256MB and this can save some money.
- Autoscaling: set Maximum number of instances to 1 - software doesn't support more anyway.
Create the service, and wait for it to be deployed, you will need the URL which will be
something like https://godometer-<random-string>.run.app. Check that you can open the
frontend on your browser before continuing.
Step 5. Set up the monitor
Go to your checkout from step 1 and build the godometer monitor command.
cd godometer/cmd/godometer
go build godometer.go
You can then move the resulting binary somewhere else for easier use, e.g.:
mv godometer ~
cd
To test it out and figure out which arguments you want to use, run:
./godometer --help
Likely you'll want to configure at least:
./godometer -apiBaseUrl https://your.server.url -apiAuth your-generated-password
Once you have these figured out, you can configure a service for this. If your machine
runs systemd (like Raspberry Pi OS does) you can use the godometer.service in the repo
root as a base. Edit it and tweak the ExecStart and WorkingDirectory appropriately.
Then we set it up on the system:
cp godometer.service /etc/systemd/system
systemd enable godometer
systemd start godometer
Check it's running fine:
systemd status godometer
Produce some data and check if it gets reported properly. If not, check the logs on both sides and try and see what's wrong.
Some technical details
Godometer monitor and Godoserv have been written in Golang to keep things snappy and easy to run on most platforms.
The monitor is waiting for simple interrupt signals on the Raspberry Pi pin 11 by default (configurable), and has been tested with the MIKROE-1646 hall sensor. It's not a particularly fantastic option so I recommend you try something else. Compatible input can be produced by a large variety of ways, anything from IR LED + IR detector, to e.g. connecting some wires via a conductive surface. Others might require some additional coding.
Godoserv has been designed to run on Google Cloud Run for easy and affordable hosting, and store data to Google Firestore. It does not actually require either, and can easily be adapted to support other (especially NoSQL + document store) databases. It uses a lot of optimization tricks to keep performance high and costs low, and as such does not without some effort scale outside 1 instance. The memory caching parts would need to be replaced with some distributed storage (DB, Redis, or similar). However for the purposes this has been designed I think the performance is going to be a very unlikely bottleneck.
Development
If you feel like further developing Godometer, it should be fairly easy.
The monitoring code is in cmd/godometer and monitor, some shared code in root of
repository.
The server side code is in cmd/godoserv and server, also uses the shares code.
Go libraries are vendored to vendor and can be updated by running go mod tidy and
go mod vendor.
The frontend code is in frontend/.
If you expect me to accept a PR you will need to ensure you use pre-commit and let it run all the formatting etc. first. I would recommend this either way.
Raspberry Pi setup for monitor
This has been tested on Raspberry Pi 4 with Linux 5.4.51-v7l+ kernel.
You will need to set up Golang, e.g.:
# Update your OS
sudo apt update
sudo apt full-upgrade

# You might want to check for latest ARMv6 downloads on https://golang.org/dl/
wget https://golang.org/dl/go1.15.linux-armv6l.tar.gz -O go.tgz

# Extract the Golang distribution
sudo tar -C /usr/local -xzf go.tgz

# Configure your environment
echo 'export GOPATH=$HOME/go' >> ~/.bashrc
echo 'export PATH=$PATH:/usr/local/go/bin:$GOPATH/bin' >> ~/.bashrc
source ~/.bashrc
Server
I ran this not on the Raspberry Pi 4 and configured it with -apiBaseUrl to connect to
the remote machine, but it might work there too. Not quite sure of the Gcloud SDK.
First set up Google Cloud SDK to get the Firestore emulator (you'll likely need the beta components).
Also make sure you have Golang installed. This has been tested with v1.14.3 but it should work with most reasonably recent versions without issues.
Then run the emulator:
gcloud beta emulators firestore start --host-port=127.0.0.1:8686
To configure your local environment to connect to it when you run the server run the following commands.
On *nix systems:
export FIRESTORE_EMULATOR_HOST=127.0.0.1:8686
Then you can run the server:
cd cmd/godoserv
go build godoserv.go
./godoserv
Or on Windows:
set FIRESTORE_EMULATOR_HOST=127.0.0.1:8686
cd cmd\godoserv
go build godoserv.go
godoserv
You may also find the dev.bat/dev.sh scripts useful.
Frontend
The frontend is a Svelte application, local development should be easy if you use the defaults and run it on the same machine as the server.
You might otherwise need to configure the proxy address in frontend/rollup.config.js.
This has been tested with:
- Node v12.18.0
- Yarn 1.22.4
Anyway, the instructions you need are:
cd frontend
yarn
yarn dev
When you're done you can build the release version with
yarn build
Some known issues and missing development
- The Y axis for the speed is somehow not rendered right, it should use a reasonable 0.0-10km/h scale, but it doesn't seem to, and the labels on the right seem to be fixed to 0.0-1.0.
- It would be nice if the
godometerCLI command would offer a well rendered real time monitoring of the data instead of just logs.
License

Financial support
This project has been made possible thanks to Cocreators and Lietu. You can help us continue our open source work by supporting us on Buy me a coffee.

 Documentation
Documentation
Index 
Constants 
const APITimeLayout = "2006-01-02 15:04"
Variables 
This section is empty.
Functions 
This section is empty.
Types 
type UpdateDataPoint 
type UpdateStatsRequest 
type UpdateStatsRequest struct {
	DataPoints []UpdateDataPoint `json:"dataPoints"`
}